Mix Preview
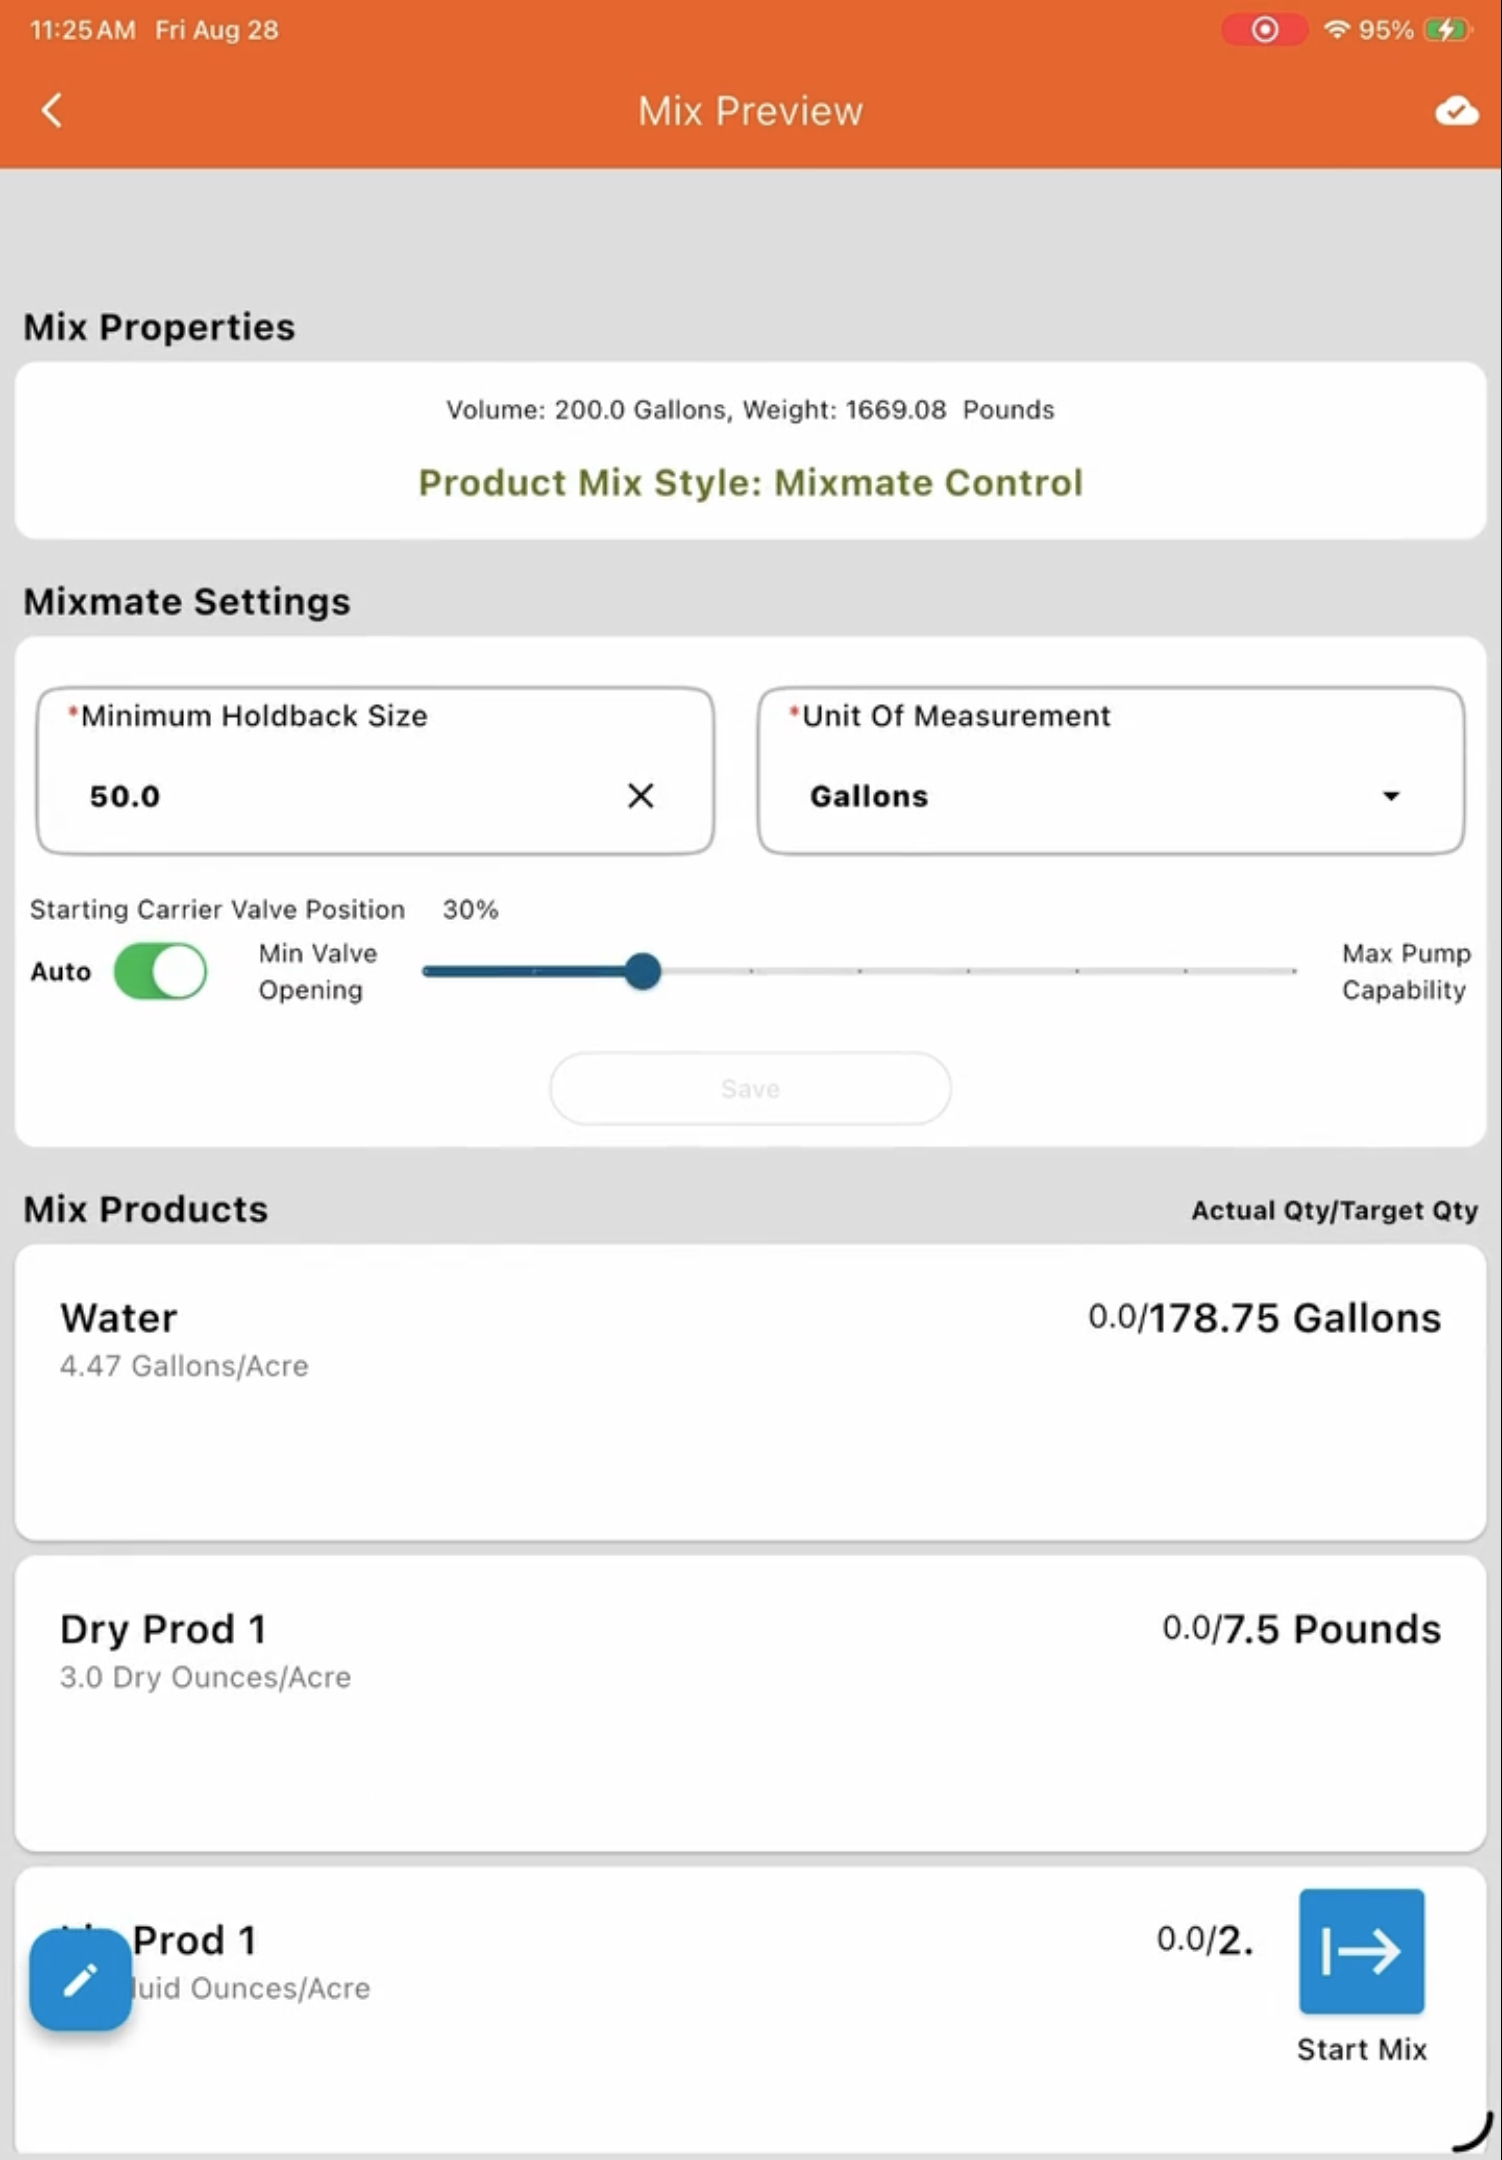
The Mix Preview page is your final checklist before the machine starts running. It displays exactly what the system is about to do, including the total amounts, valve settings, and product list.
1. Mix Properties
Section titled “1. Mix Properties”This section provides an estimate of the final mix and lets you see the Mix Style.
Totals: Displays the estimated Total Volume and Total Weight of the finished solution.
Mix Style: Determines how the products are added — see Product Mix Styles for the Mixmate Control, User Control, and Sequential options.
2. Mixmate Settings
Section titled “2. Mixmate Settings”This section allows you to make last-minute adjustments to how the machine handles the carrier (water) and system logic.
Holdback Size: Adjusts how much carrier water is held back for rinsing.
Starting Carrier Valve Position: Sets how open the main water valve is at the start.
Guideline: If your mix has a high percentage of carrier water, you can start with a larger valve position. If the carrier percentage is low, use a smaller position.
Auto-Adjust: You can enable the machine to automatically adjust this position for the best performance.
Important: If you change any setting here, you MUST press SAVE for the changes to apply.
3. Mix Conditions
Section titled “3. Mix Conditions”This section lists any environmental or field conditions required for this mix (e.g., Wind Speed, Temperature).
When do they appear? A condition shows up here if "Apply to Every Mix" is turned on in settings, or if a specific product in the Work Order requires it.
Adjusting Product Rates
Section titled “Adjusting Product Rates”If a product uses Variable Rate, On/Off Rate, or Custom Condition instead of a flat Static Rate, you can adjust it right here without editing the Work Order:
Variable Rate: The product displays its Default Rate. Tap the rate to enter any value you want — but if it falls outside the Minimum/Maximum set on the Work Order, the mix calculations will use the Minimum or Maximum instead of the value you entered.
On/Off Rate: Enter 1 to include the product in the mix, or 0 to skip it entirely for this mix.
Custom Condition: Adjusting the linked Condition's value above live-updates this product's rate — and the carrier amount needed — based on the curve defined on the Work Order. The same rule applies here: if the entered value falls outside the range of points on your curve, the rate at the nearest end of the curve is used.
4. Mix Products
Section titled “4. Mix Products”This list details every product that belongs to the current Work Order.
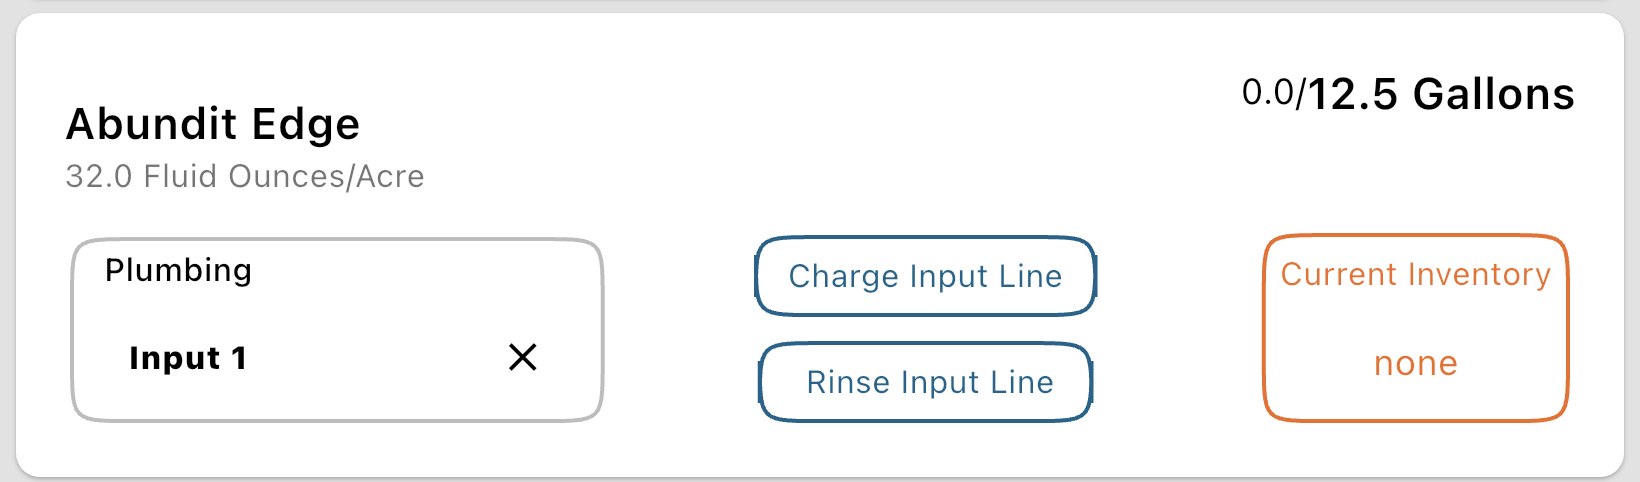
Editing a card: Tapping directly on a product card does nothing — you must first press the pencil icon floating action button in the bottom-left corner of the screen to switch every product card into edit mode, which allows for assigning plumbing, toggling Charge/Rinse Line, and editing inventory.
Product Name: Shows the name and the final target application rate.
Plumbing: Shows which valve or input the machine will use.
Note: If this is left Unassigned, it means the machine will not control this product. You are expected to add it manually (outside of the Mixmate equipment), but it will still be recorded in the history.
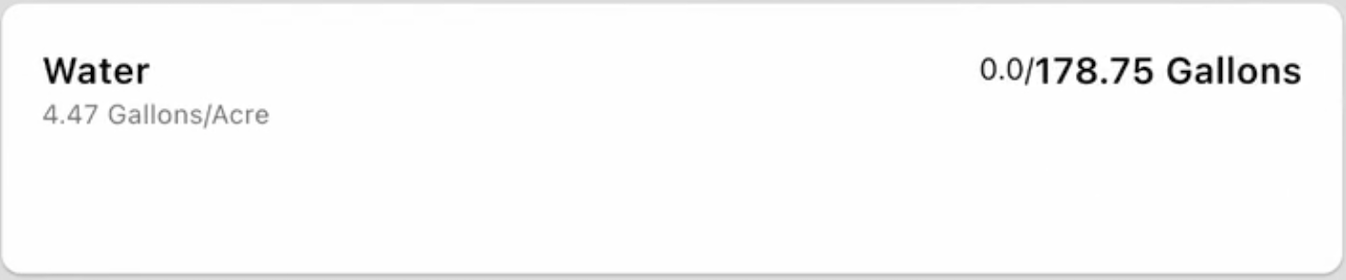
Amount Added / Total Amount: Displayed as a fraction (e.g., 0.0/178.75 Gallons) — the first number is how much of this product has actually been added so far; the second, bolded number is the total target amount for this mix.
Why does this matter? If you are resuming a mix (Recovery Mode), Amount Added lets the operator see exactly how much of this product had already been added before the mix was paused.
In edit mode, a card reveals all of its editable options at once — the Plumbing dropdown, the Charge Input Line and Rinse Input Line buttons, and the Current Inventory button:
Assigning Plumbing
Section titled “Assigning Plumbing”"Assigning Plumbing" means telling the system which physical valve or pump controls a specific product. This is required for the machine to automatically measure and move that product.
How to do it: With the product cards in edit mode (see above), the Product Card itself reveals a dropdown where you can select the correct input (e.g., "Inductor," "Tote 1," "Bulk Tank").
Note: This dropdown only appears if a Mixmate was selected on the Mix Setup page — without one, there's no hardware to assign plumbing to.
Managing Current Inventory
Section titled “Managing Current Inventory”The system can track how much product is left in your containers, warning you if you don't have enough to finish the mix — see Managing Current Inventory for the prerequisite, the warnings, and how to correct the number. This button only appears if the feature is both unlocked for your tier and turned on in Group Settings.
Charging and Rinsing Lines
Section titled “Charging and Rinsing Lines”If you are pumping chemicals through long hoses, you can tap the Charge Input Line and Rinse Input Line buttons on a product's card (while the cards are in edit mode) to account for the liquid inside the hose at the start and end of the mix — see Charging and Rinsing Lines for prerequisites and how each works. These buttons only appear if the feature is unlocked for your tier and Hose Dimensions have been set on that product's plumbing input.
5. How to Start
Section titled “5. How to Start”When you have reviewed all settings and are ready to begin, press the Blue Arrow (>) button in the bottom right corner. This will move you to the mixing screen and start the process.