During a Mix
While a mix is running, the screen organizes your mix information into cards and tiles. This guide explains the specific layout, buttons, and status indicators used.
The Exit / Pause Button
Section titled “The Exit / Pause Button”Located in the top-left corner, pressing this button pauses the mix and opens a dialog with three options.
The Options:
Save for Recovery: Select this if you need to stop now but finish later (e.g., swapping a tote). It saves your current state.
Save and Complete: Select this if you are done. This finalizes the mix and saves it to history.
Cancel: Returns you to the mix screen to keep working.
Mix Status Card
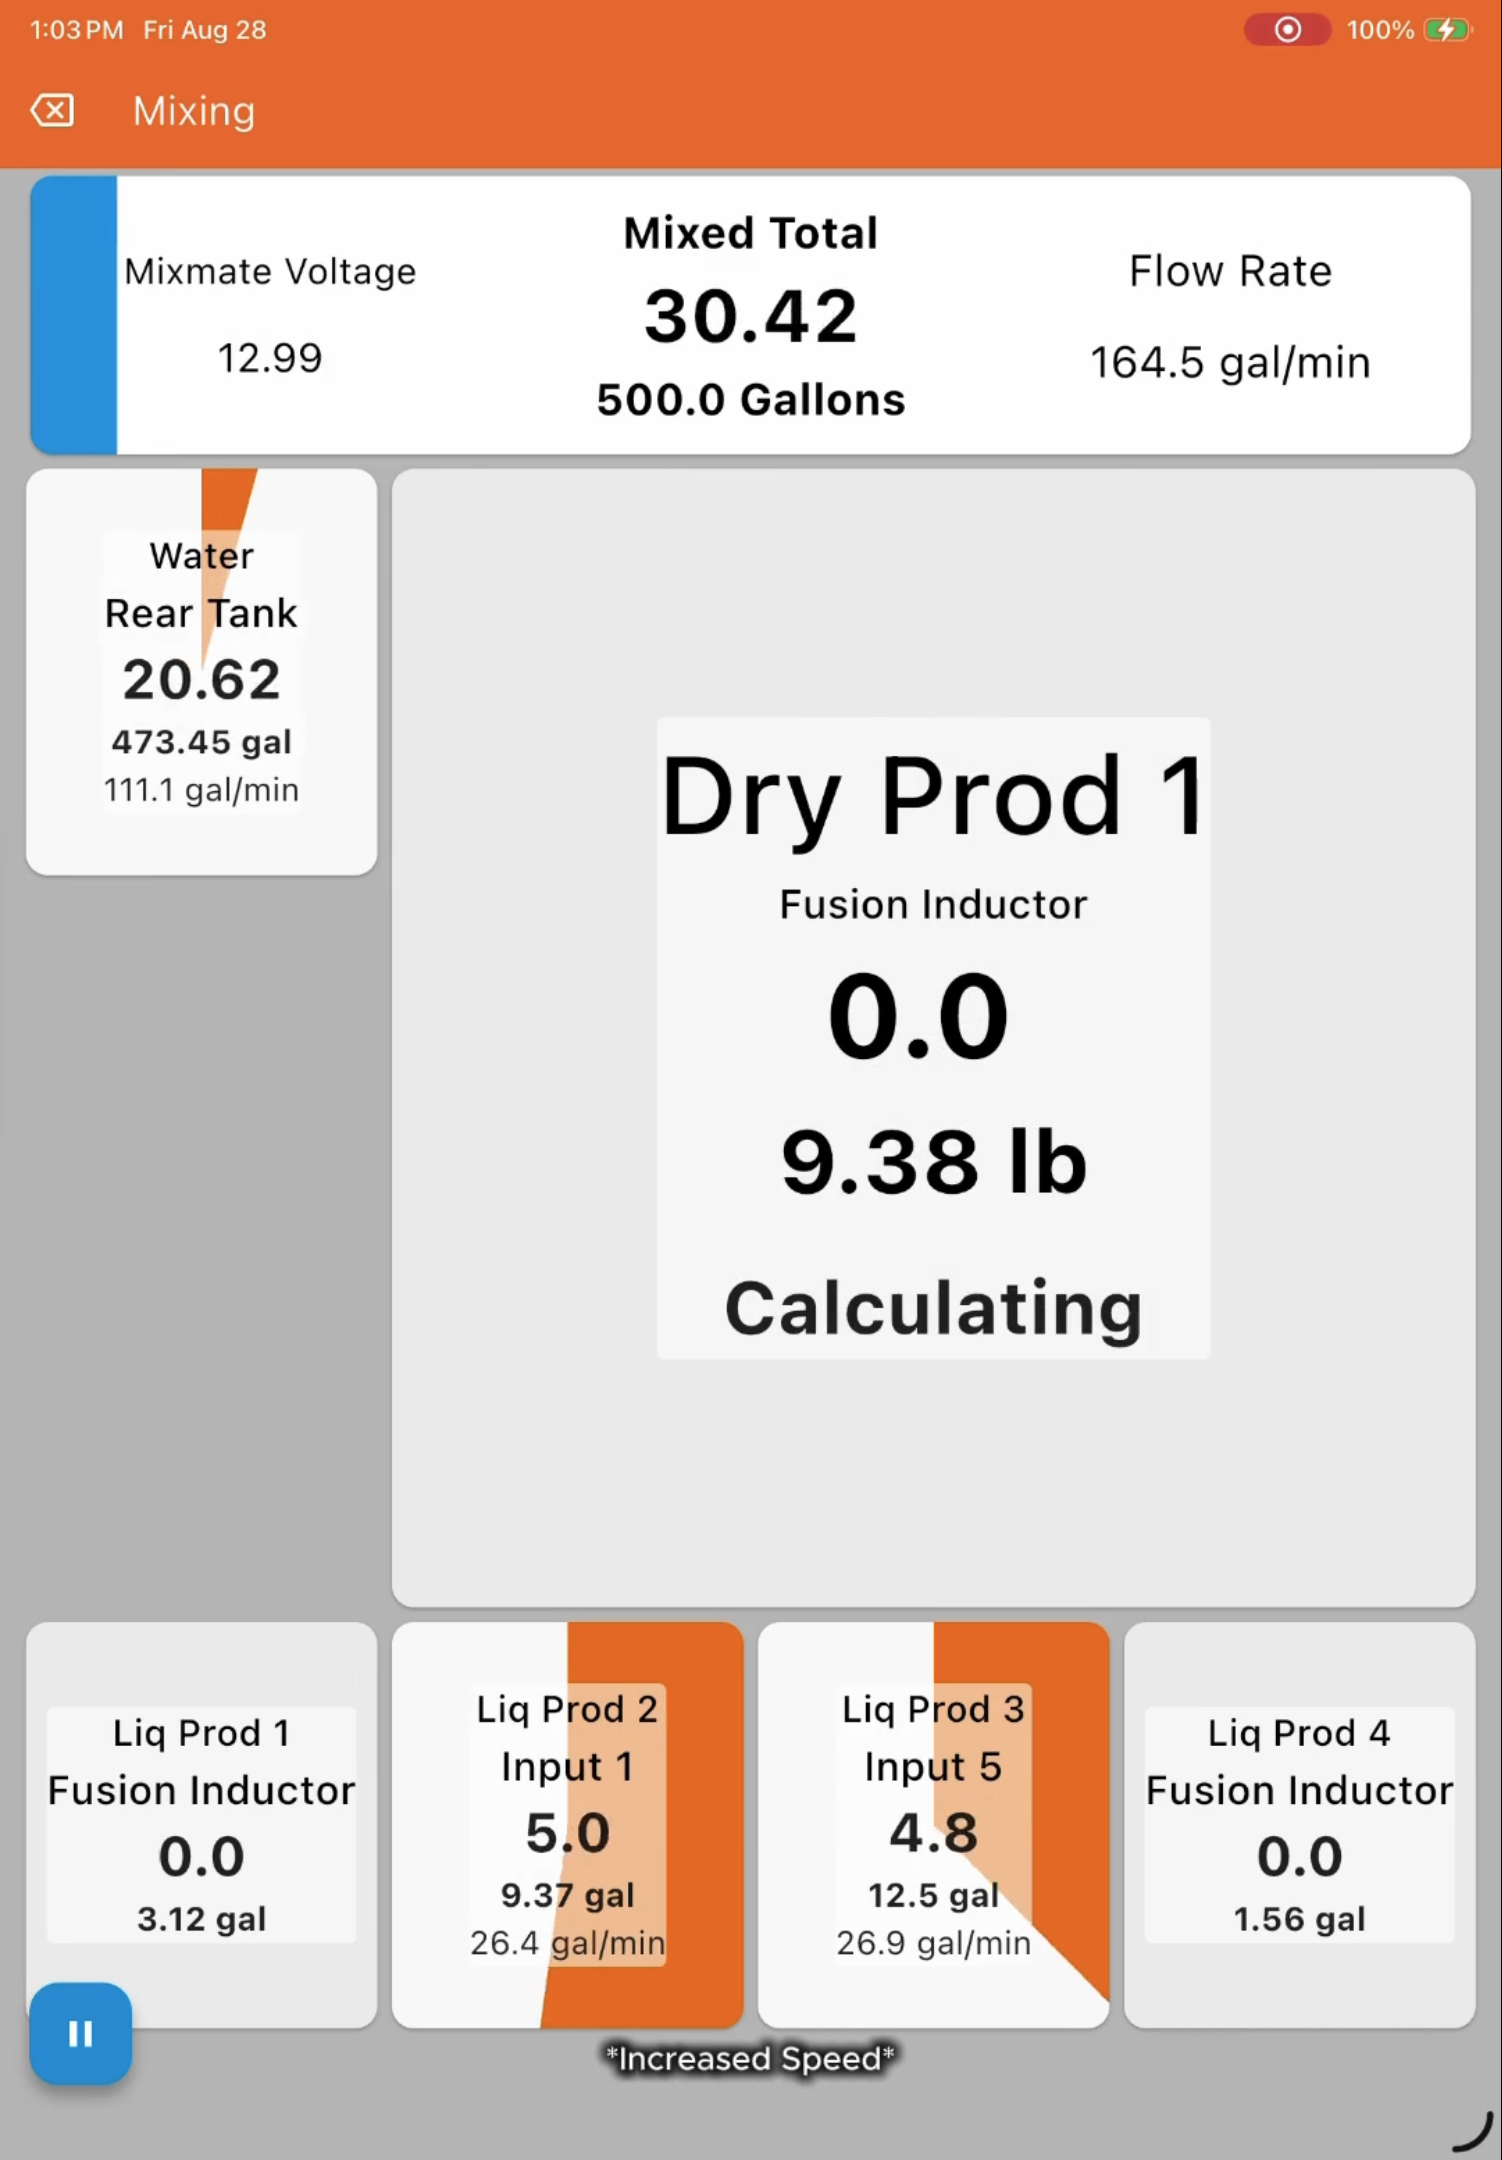
Section titled “Mix Status Card”The Mix Status Card acts as the "instrument cluster" for the machine.

Key Indicators:
Voltage: Displays the electrical voltage reading at the power module (the white box behind the status light).
Mixed Total: A running total of the entire batch so far.
Overall Flowrate: The combined speed of all products flowing into the tank at this moment.
Product Cards: Small Layout (Tiles)
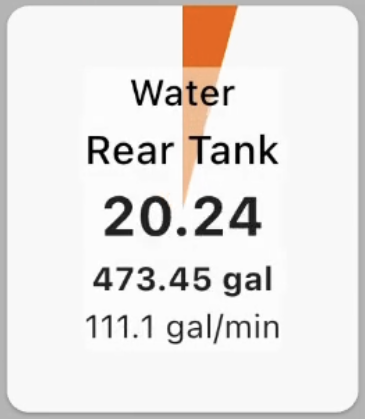
Section titled “Product Cards: Small Layout (Tiles)”Products appear as tiles. This allows you to see the status of many products at once.
Key Fields:
Name: The product name.
Plumbing: Which valve or pump is controlling this product.
Actual: How much has been added so far.
Target: The total amount required.
Status Colors & Animations The visual indicators on the tiles work as follows:
White/Gray: Waiting. The product has not started yet.
Clockwise Orange Fill: In Progress. The background fills up in a clockwise motion as the product is added (like a pie chart).
Shaded Overlay: Rinsing or Pre-filling is active.
Green: Complete. The target amount has been reached.
Product Cards: Large Layout (Standard)
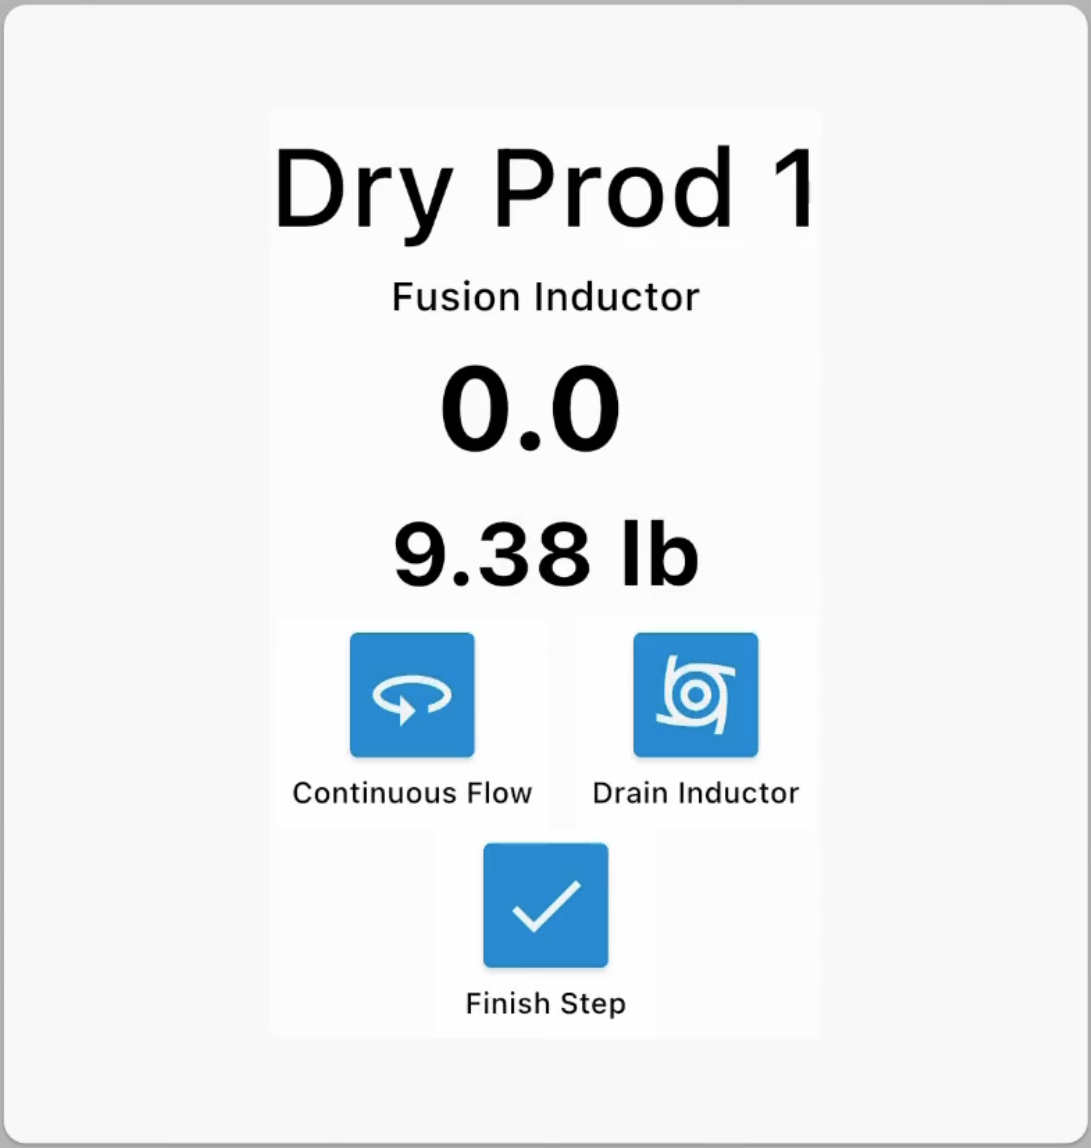
Section titled “Product Cards: Large Layout (Standard)”When you tap a tile or the machine requires your input, the card expands to the Large Layout. This is used for manual additions, typically through an inductor.
Key Buttons:
Continuous Flow: Switches to "Continuous Flow" mode for large dry batches (requires a set container size).
Drain Inductor: Records the weight, drains the inductor, and resets for the next batch.
Finish Step: Marks the product as complete.
Note: If using a Pro Inductor, closing the lid acts as pressing this button.
Product Cards: Large Layout (Continuous Flow)
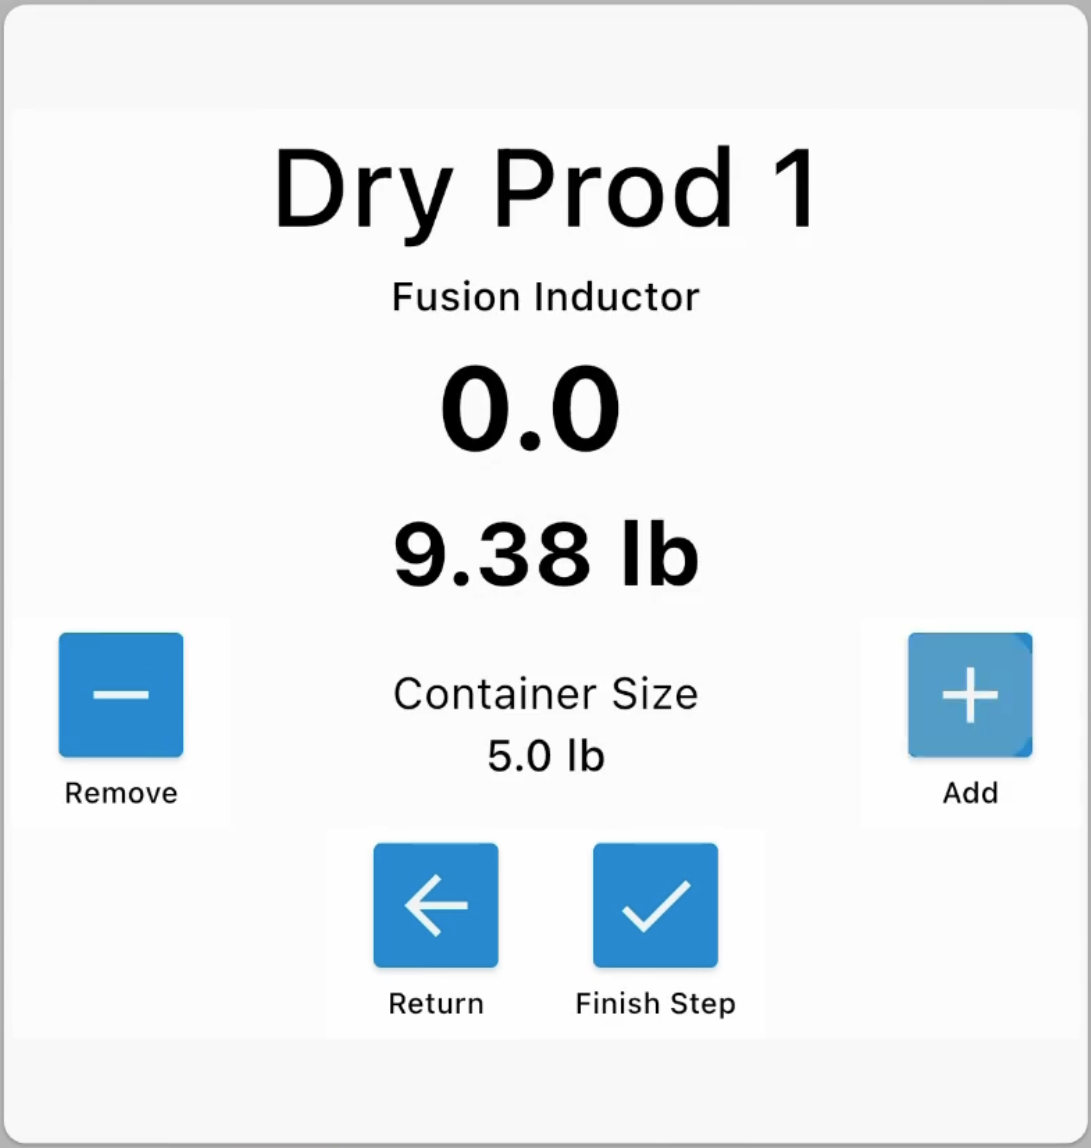
Section titled “Product Cards: Large Layout (Continuous Flow)”This mode is designed for adding multiple containers of dry flowables. It maintains a water level in the inductor automatically so you can pour continuously without clogging.
How it Works:
Container Size: Displays the size of one bag/jug.
(+) Add: Adds one full container to the total count.
(-) Remove: Removes one container from the count (to fix errors).
Return: Goes back to the standard view.
Finish Step: Press this when you have finished pouring all containers.